Friday, March 4, 2016

Desperate Defense: The Relief of Kassel, Part 2

With Joe Vandeleur's tanks withdrawn to prevent them from being completely destroyed, an Armored Rifle Company from the 9th Armored Division has moved into position to keep the town defended against the imminent onslaught of another Tankovy Battalion. Will Joe's strategy pay off, and win the Capitalists a resounding victory as well as put them into position to break the encirclement of Kassel, or will the Soviets finally come out on top and pour into West Germany? With both sides having now realized the importance of the coming few battles, there are no company morale checks, as all soldiers are expected to fight to the death for their causes. With that, let the battle begin!


The US forces brace to face the Soviets

 Soviet Turn 1:
Everything moves forward, and air shows up with 2 planes.

The Soviets move to start smashing the defenders


Despite their ambition and massive concentration of firepower, the Reds only manage to gun down one team of rifles, and the air support pins down a platoon. An anticlimactic start to a large and important battle.


US Turn 1
Air shows with two planes, and some M4A3E8s arrive from reserve. They are quickly rushed into the fight against the communists.

The air continues its tradition of doing nothing, but the E8s are able to nail a T-34/85 from across the board. In the center, a lucky bazooka shot bails a T-34. Some very lucky hits this turn.


To be continued...


Monday, February 29, 2016

Return of Joe Vandeleur: The Relief of Kassel, Part One

To pick up where we left off in the World War III Scenario set immediately after World War Two, American counterattacks near where the Soviets broke the US defensive line have stabilized the front, while elsewhere, Soviet attacks have failed to breach other sections of the US line. The Soviets have also invaded China in support of the Communists, as well as South Korea. With the front around Kassel in a stalemate, both sides rush reserves to make more progress. On the Capitalist side, a large tank force under Joe Vandeleur, supported by elements of the 9th Armored Division are leading the attack into Soviet positions, encountering two Hero Tankovy Battalions! A small force is brought up from the rear to distract one of the battalions, while Joe's tanks engage the other one just outside Kassel. Joe's tanks, however, have outrun the infantry support. If Joe can defeat the first battalion with time to spare, the supporting infantry will be able to move in to defend the secured ground from the second battalion, allowing Joe's tanks to withdraw and await reinforcements for the final push to Kassel. If Joe's tanks are defeated, however, the Soviet spearhead will crush the infantry currently rushing to catch up to Joe, and will be able to lead a breakthrough into West Germany.

British List:
Compulsory Armoured Squadron HQ (Guards Armoured Division) (p.103) - CinC Sherman V, 2iC Sherman V (170 pts)
- 1x Sherman V (160 pts)
- Warrior Joe Vandeleur (in a Sherman) (50 pts)

Compulsory Armoured Platoon (Guards Armoured Division) (p.103) - Command Sherman V, Sherman V, 2x Firefly VC (435 pts)

Compulsory Armoured Platoon (Guards Armoured Division) (p.103) - Command Sherman V, Sherman V, 2x Firefly VC (435 pts)

Armoured Platoon (Guards Armoured Division) (p.103) - Command Sherman V, Sherman V, 2x Firefly VC (435 pts)

Anti-tank Platoon (SP), Royal Artillery (p.136) - Command M10C 17pdr SP, M10C 17pdr SP (185 pts)

Medium Battery, Royal Artillery (p.139) - Command Rifle, Staff, Command Rifle, Observer Rifle, OP Carrier, 4x BL 5.5” gun (310 pts) (Off-board)


2180 Points, 6 Platoons 

Soviet List:
Compulsory Hero Tankovy Brigada HQ (Guards) (p.39) - CinC T-34/85 obr 1944 (95 pts)

Compulsory Hero Tankovy Company (Guards) (p.39) - Command T-34/85 obr 1944, 2x T-34/85 obr 1944 (280 pts)

Compulsory Hero Tankovy Company (Guards) (p.39) - Command T-34/85 obr 1944, 2x T-34/85 obr 1944 (280 pts)

Hero Tankovy Company (Guards) (p.39) - Command T-34/85 obr 1944, 2x T-34/85 obr 1944 (280 pts)

Guards Hero Heavy Tank Company (p.52) - Command IS-2 obr 1944, 2x IS-2 obr 1944 (450 pts)

Hero Medium Assault Gun Company (Guards) (p.51) - Command SU-100, 2x SU-100 (360 pts)

Hero Sapper Company (Guards) (p.54) - Command Rifle, 6x Pioneer Rifle (155 pts)

Air Support (p.31) - Priority Il-2M Tip 3M Shturmovik (290 pts)


2190 Points, 6 Platoons  

Dispositions before the battle (White squares are objectives). The Brits have the first turn. Joe's tank is proxied with a Cromwell, and the VCs are proxied with 76mm Shermans

British Turn 1:
Company HQ moves up to face the pioneers.

 Joe and the rest of the force moves to the edge of town to occupy the open area on the left flank.
 
Skillful British gunnery claims all of the SU-100s, and the artillery nails a T-34/85.
 

Soviet Turn 1:
One plane shows up, and the communist armor plows ahead.
The pioneers on the Soviet right dig in. The lone plane manages to destroy a Sherman V, but otherwise, the Reds score nothing but bails.


British Turn 2
Both the M-10 and the Sherman decide to get back in. The Sherman platoon on the far right moves to secure the town.

The HQ Shermans move up to put more pressure on the pioneers.


Lots of whiffing occurs, but two tanks of the JS-2 platoon are bailed out by fire from the Sherman Fireflies and more artillery strikes.

After suffering another loss, the 1st Tankovy Company runs from the field. The Shermans are unable to hit the pioneers, who have spent all this time hiding.

Soviet Turn 2
One plane arrives again, and the horde takes positions in the town. One T-34 bogs on a wall in the town. The JS-2s, having stayed put and remounted, concentrate their fire on the tanks in the center, and knock out another Firefly, while the plane bails a Sherman V.


JS-2s just chillin'

The redeployment of the Soviet tanks to the center pays off, and the sheer firepower manages to score a Firefly.
 

British Turn 3
Reeling from steady losses, the far right Shermans take cover in the town, and Joe moves to reinforce them.


The HQ moves into position to assault the pioneers.


The firefly in the town only manages a bail on a T-34, but the other Shermans and Joe chalk up a kill.


Yet again, the Brits cannot pass firepower, and cause another bail on the JS-2s. The T-34 platoon with the bogged tank sticks around, but the pioneers are forced to cede the objective to the Shermans in an assault.


Soviet Turn 3
The plane fails to sow, but the pioneers unpin and prepare to assault. The two bailed T-34s remount, and the one on the far right pivots to support the pioneers.

The Soviet boys in the center dispatch a Sherman and bail the last Firefly. Joe steadies the Shermans, and they decide to fight on.


The JS-2s do nothing, and the last T-34 of 3rd platoon fails to provide a much needed kill or bail to support the pioneers. The pioneers go in and make quick work of a Sherman, but suffer heavy casualties in the counterattack and are routed off the board.


British Turn 4
The Firefly in the center fails to remount, so the HQ Shermans risk their lives in a daring gamble to prevent the Shermans in the center from losing the town, and thus stop the Soviets from achieving a breakthrough to the objective.


All the firepower concentrated on the JS-2s doesn't scratch them, but the flanking Shermans manage to get a kill and a bail on the T-34s in the town, and Joe's tank lights up another.

Saved!

This forces two checks, but the Reds pass both.

Soviet Turn 4
One plane shows up, and the Soviets in the center redeploy to counter the threat from the HQ Shermans. Yes, that one guy bogged on the wall still hasn't remounted.

The plane and the flanking T-34s miss, but in a stroke of huge misfortune for the Brits, their beloved Joe is obliterated by the persistent Communist tanks. The JS-2s finally do something, and they wipe the floor with the far left Sherman platoon.


British Turn 5
The Brits capitalize on the failure of the T-34s, and the flanking game continues. The center Shermans move up (one bogs on the wall) and the Firefly remounts.
 

With Joe dead and most of the Company strength gone, the situation seems rather hopeless for the disheartened Brits. But then...


All but one T-34/85 remains operational in the center, after a scathing round of British shooting. The Soviet Battalion Commander is among the dead, and the Communists are now below half strength, forcing them to withdraw.

As the Brits mourn the loss of their hero, a shady figure limps out of one of the tanks in the center, revealing himself to be the one and only Joe Vandeleur, having survived by the skin of his pants. The victorious British tankers are ordered to withdraw for time to rest and refit, while a company of armored rifles comes to take their place and hold the town against the imminent assault of the 2nd Soviet Battalion. Will the Soviets finally earn a resounding victory and crush the remnants of Joe's tanks while they are unprepared, paving the way for the Soviets into West Germany, or will the Armored Rifles hold back the Communist tide? Find out later this week, in The Relief of Kassel: Part Two!


Sunday, February 28, 2016

Back in the game (again)

To pick up where we left off in the World War III Scenario set immediately after World War Two, American counterattacks near where the Soviets broke the US defensive line have stabilized the front, while elsewhere, Soviet attacks have failed to breach other sections of the US line. The Soviets have also invaded China in support of the Communists, as well as South Korea. With the front around Kassel in a stalemate, both sides rush reserves to make more progress. On the Capitalist side, a large tank force under Joe Vandeleur, supported by elements of the 1st Infantry Division are leading the attack into Soviet positions, encountering two Hero Tankovy Battalions! A small force is brought up from the rear to distract one of the battalions, while Joe's tanks engage the other one just outside Kassel. Joe's tanks, however, have outrun the infantry support. Can Joe defeat the first Tankovy battalion before the other one comes to support it? Will the infantry arrive in time? This week, stay tuned, as the size of the report will mean I have to post it in small parts each day.

Thanks for sticking around,
Team Truman

Thursday, October 22, 2015

Yep

I haven't been around much lately, with tons of work to start off the fall. I've been putting off posting the next Cold War battle report (it's sitting on my desk) but it will be posted tonight, as I've got a lucky break tonight. This weekend is free for me, so hopefully my friends and I can get another battle report done.

Thanks for watching,
Kampfgruppe Truman

Tuesday, September 29, 2015

Soviet Hero Tankovy faces US defensive line outside Fulda, Cold War scenario

As talks over the border dispute begin to fail, the American troops stationed near the Fulda Gap maintain an uneasy rest on the night of July 3rd. Early in the morning, a watchman sees something in the distance; a massive Communist invasion force, headed straight for the American Occupation Zone! Immediately, he warns his captain, who calls desperately for reinforcements. The border outpost is not designed to withstand a major attack, and has little antitank protection, save for bazookas, which are only effective at close range. As the Soviets draw nearer, a massive artillery bombardment crashes around the men. It quickly stops, however, giving the Americans valuable time to regroup and settle their nerves to take on the brunt of the Soviet invasion. As the whole world looks on in silent terror, both sides know they will decide the fate of the world that day. The Americans pray for reinforcements to arrive quickly, while back in London, DC, and Paris, world leaders are preparing their response. A task force under Joe Vandeleur is sent towards Kassel, to contest the Soviet invasion, should it break the line, while artillery and planes are gathered to the front to face the Soviets. This is it. Everyone knows, that today, the fate of the world, will be fought over. (Battle Report to be posted tonight/tomorrow)


Lists (here we screwed up: instead of replacing the rifle teams with bazookas, I just added bazookas, and the wrong number at that! but we forgot about there being a Jumbo in the list, so we figured it worked out evenly. I took the jumbo out of the written list after the game, which is why the US list appears at 1700, and the Soviet one appears at 1725.)

US Rifle Company (CV)

Compulsory Rifle Company HQ (p.49) - CinC Carbine, 2iC Carbine (15 pts)

Compulsory Rifle Platoon with Hero (p.49) - Command Rifle, 9x Rifle, Bazooka (200 pts)
- 3x Replace Rifle with Bazooka (must have 9x Rifle) (15 pts)

Compulsory Rifle Platoon (p.49) - Command Rifle, 9x Rifle, Bazooka (200 pts)
- 3x Replace Rifle with Bazooka (must have 9x Rifle) (15 pts)

Mortar Platoon (p.51) - Command Carbine, 4x M1 81mm mortar (110 pts)

Anti-tank Platoon (p.51) - Command Carbine, 3x Bazooka (60 pts)
- 2x Bazooka (40 pts)

Ammunition and Pioneer Platoon (p.52) - Command Pioneer Rifle, 6x Pioneer Rifle (165 pts)
- 2x Bazooka (40 pts)

Anti-tank Platoon (p.51) - Command Carbine, 3x Bazooka (60 pts)
- 2x Bazooka (40 pts)

Tank Platoon (p.68) - Command M4 or M4A1 Sherman, 4x M4 or M4A1 Sherman (415 pts)
- 3x Replace M4 or M4A1 Sherman with M4A3 Sherman (late) (60 pts)
- Replace M4 or M4A1 Sherman with M4A3 (76mm) Sherman (55 pts)

Light Tank Platoon (2nd Cavalry Group) (p.67) - Command M5A1 Stuart, 2x M5A1 Stuart (155 pts)


1700 Points, 8 Platoons

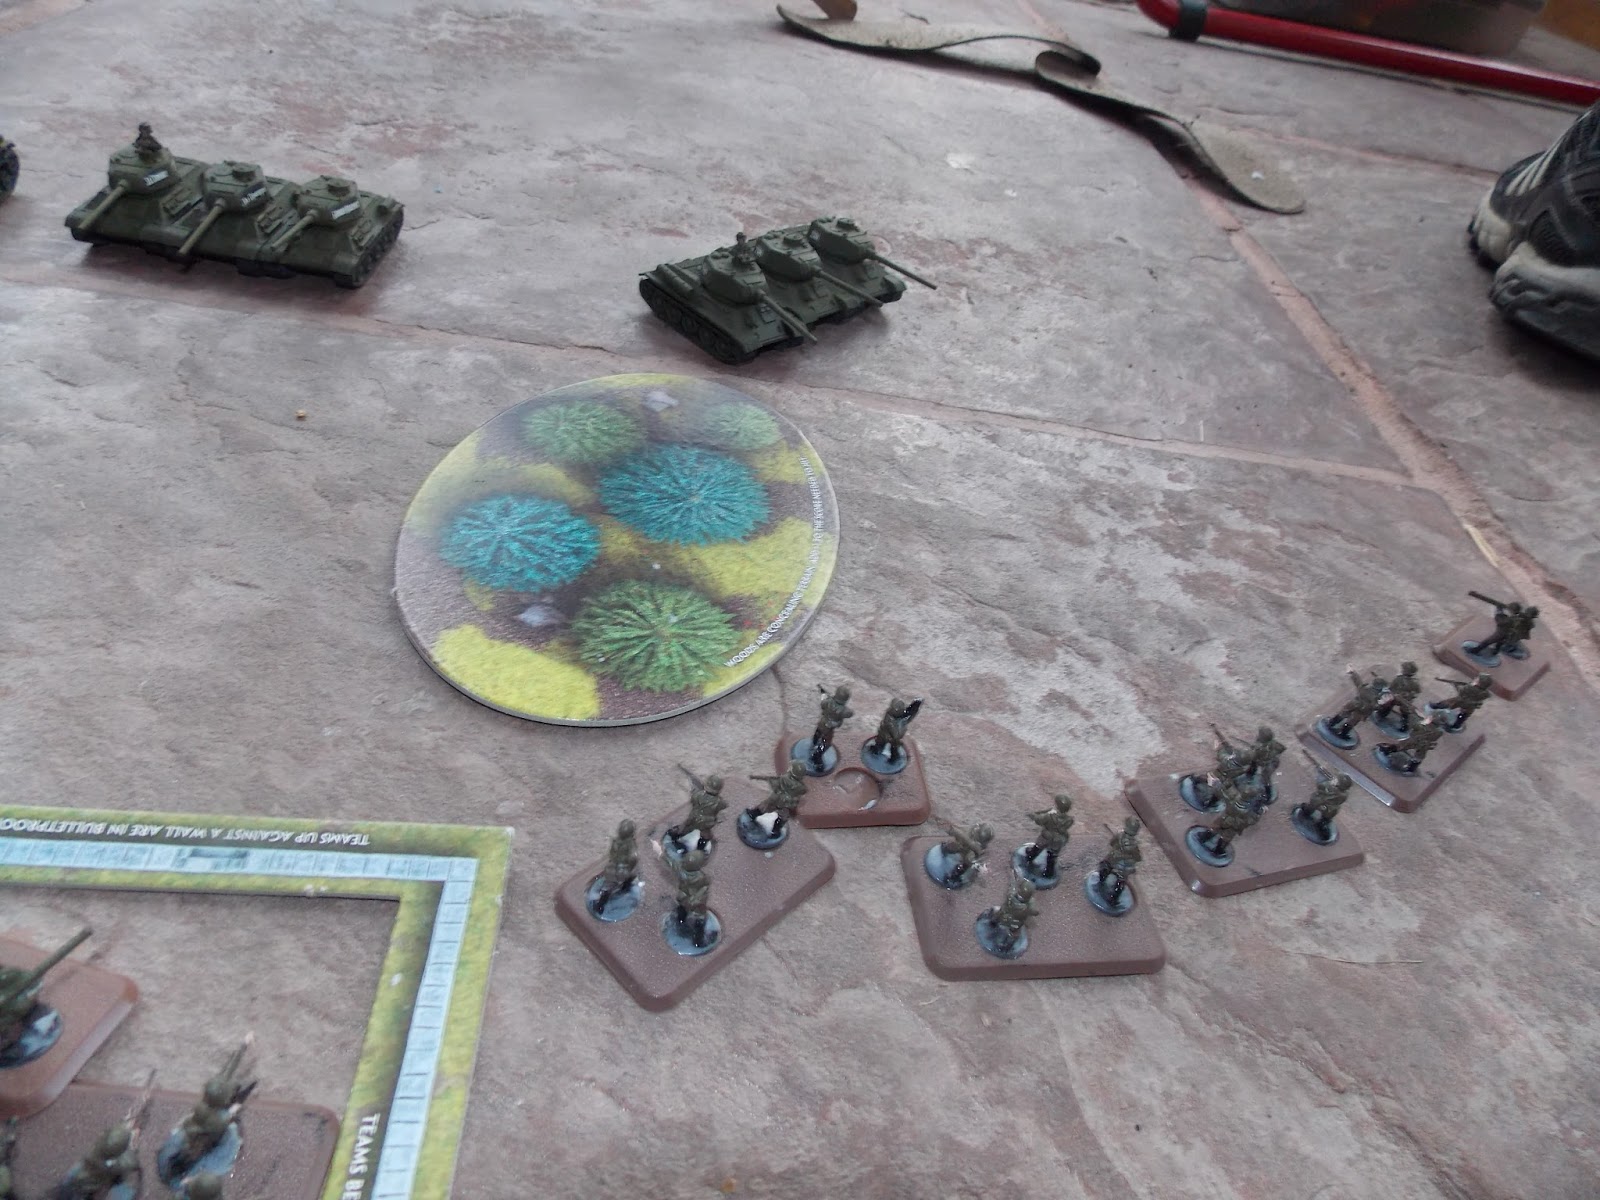
My friend elected to keep the 2 rifle platoons, mortars, and 2 platoons of zooks on the board, with one platoon of the zooks in ambush. The rest was held in reserve.

Soviet Hero Tankovy (FT)
Compulsory Hero Tankovy Brigada HQ (Guards) (p.39) - CinC T-34/85 obr 1944 (95 pts)

Compulsory Hero Tankovy Company (Guards) (p.39) - Command T-34/85 obr 1944, 2x T-34/85 obr 1944 (280 pts)

Compulsory Hero Tankovy Company (Guards) (p.39) - Command T-34/85 obr 1944, 2x T-34/85 obr 1944 (280 pts)

Hero Tankovy Company (Guards) (p.39) - Command T-34/85 obr 1944, 2x T-34/85 obr 1944 (280 pts)

Guards Hero Heavy Tank Company (p.52) - Command IS-2 obr 1943, 2x IS-2 obr 1943 (415 pts)
- 3x .50 Cal AA MG for IS-2 (15 pts)

Hero Medium Assault Gun Company (Guards) (p.51) - Command SU-100, 2x SU-100 (360 pts)


1725 Points, 5 Platoons


Soviet Turn 1
Everything moves up, except for 1 T-34, who bogs on the wall
 JS-2s in the center looking mean
 Some T-34s move to the US right flank
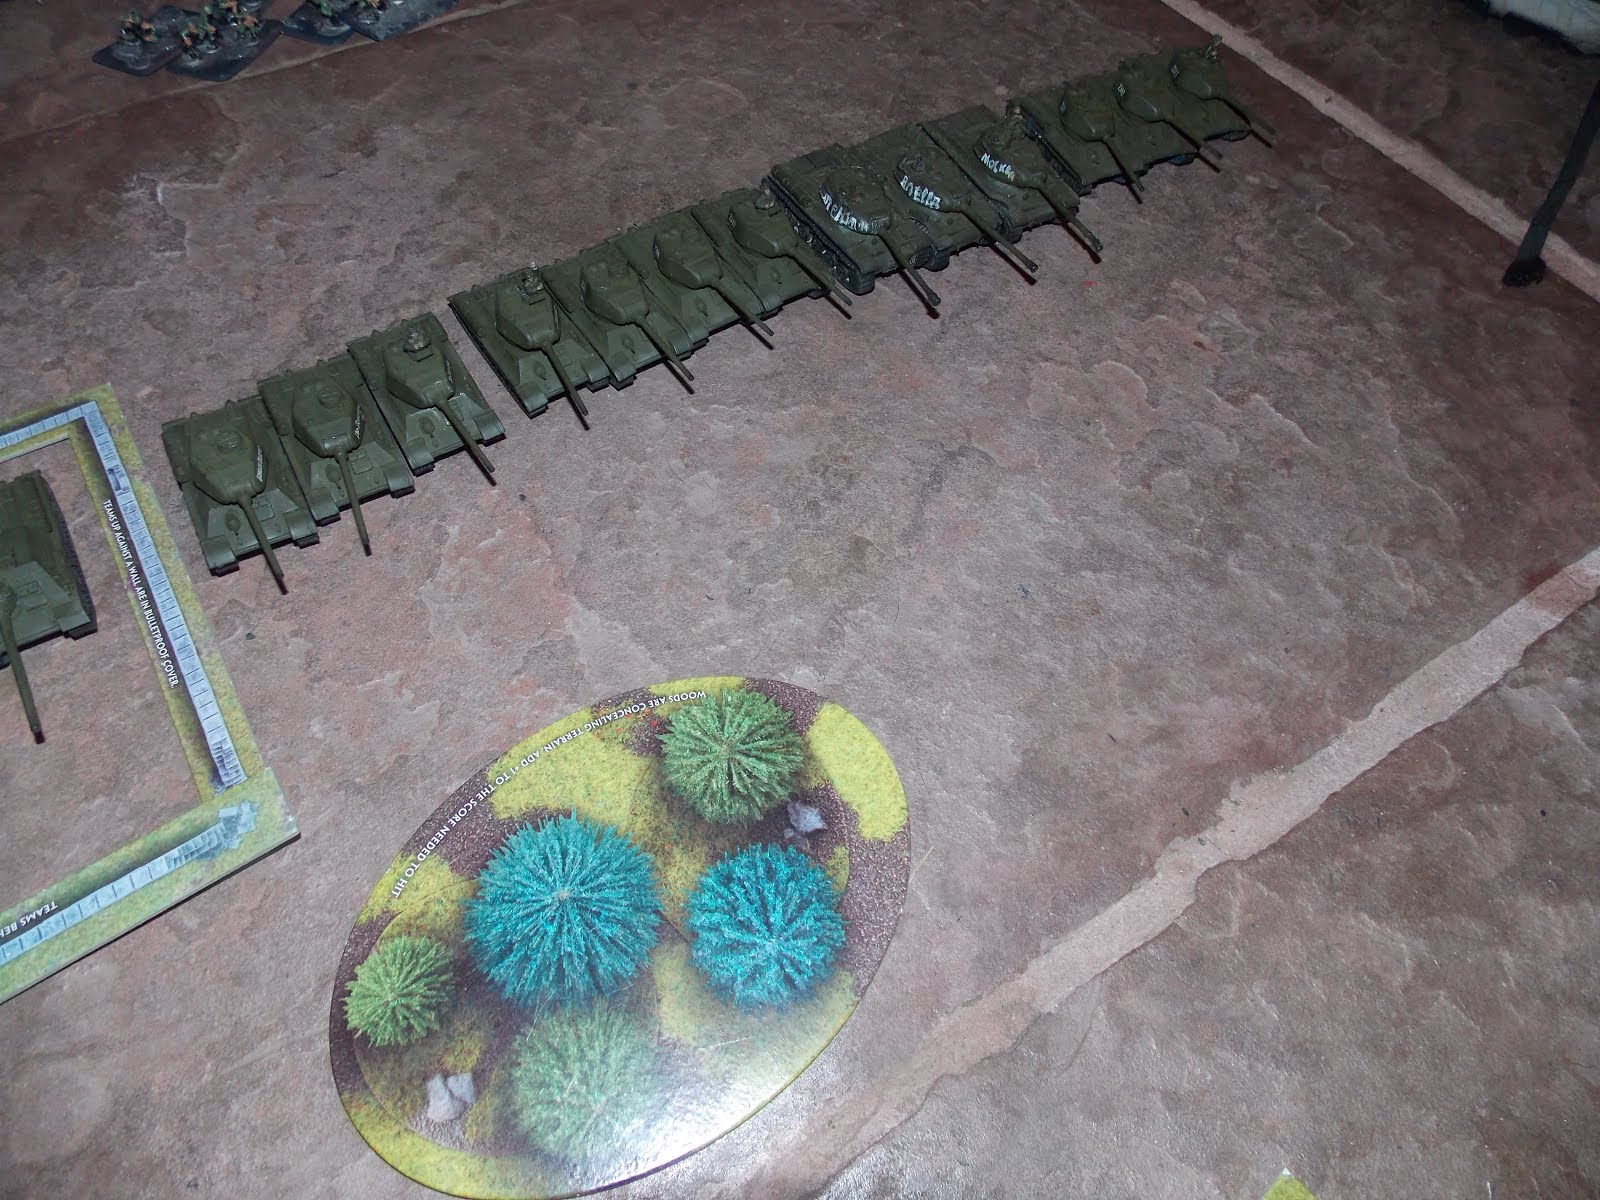
 The Soviet line
 View from the Soviet Side

 SU-100s and Company Command (guy waving his arm in the air)
The JS-2s fire first, followed by literally everything else, but it all misses. An inauspicious start to the Communist invasion.

US Turn 1
Reserves fail to arrive, and everything stays put. The bazookas are not in range of anything, so the US can't really do anything about the Soviets right now, except keep them smoked, which they do.


Soviet Turn 2
Everything moves up, and the bogged down T-34 manages to free itself and join the rest of his platoon. The T-34s on the US right stay put.

SU-100s redeploy
 So do the T-34s
 JS-2s and T-34s roll past the smoke, but out of range of the zooks

The JS-2s pulverize a stand of infantry in the center, while the SU-100s butcher two squads on the US left.

First blood
JS-2 blows everything it hits to smithereens

US Turn 2
Reserves arrive in the form of Stuarts and Shermans, with the Shermans driving up the US right, and the Stuarts moving towards the SU-100s, hoping to get some lucky side shots in.

My friend is cautious with the Shermans, careful to stay out of sight of the JS-2s
 While the Stuarts hug the forest on the US left.

Yet again, nothing can really shoot, save for the mortars, who continue smoking the JS-2s


Soviet Turn 3
The T-34s on the US right flank pull back behind the wood, seeing the threat of the more numerous and better gunned Shermans (more numerous than Soviets?! how did that happen?)

While on the other flank, everything moves to thwart the threat of the Stuarts. The Stuarts may be a little outgunned and outnumbered...
 I just love the look of SU-100s
 Shooting on the right sees the Soviets miss again, while the JS-2s and T-34s in the center also miss. The SU-100s pop one Stuart and bail his buddy.
 Toasted!


US Turn 3
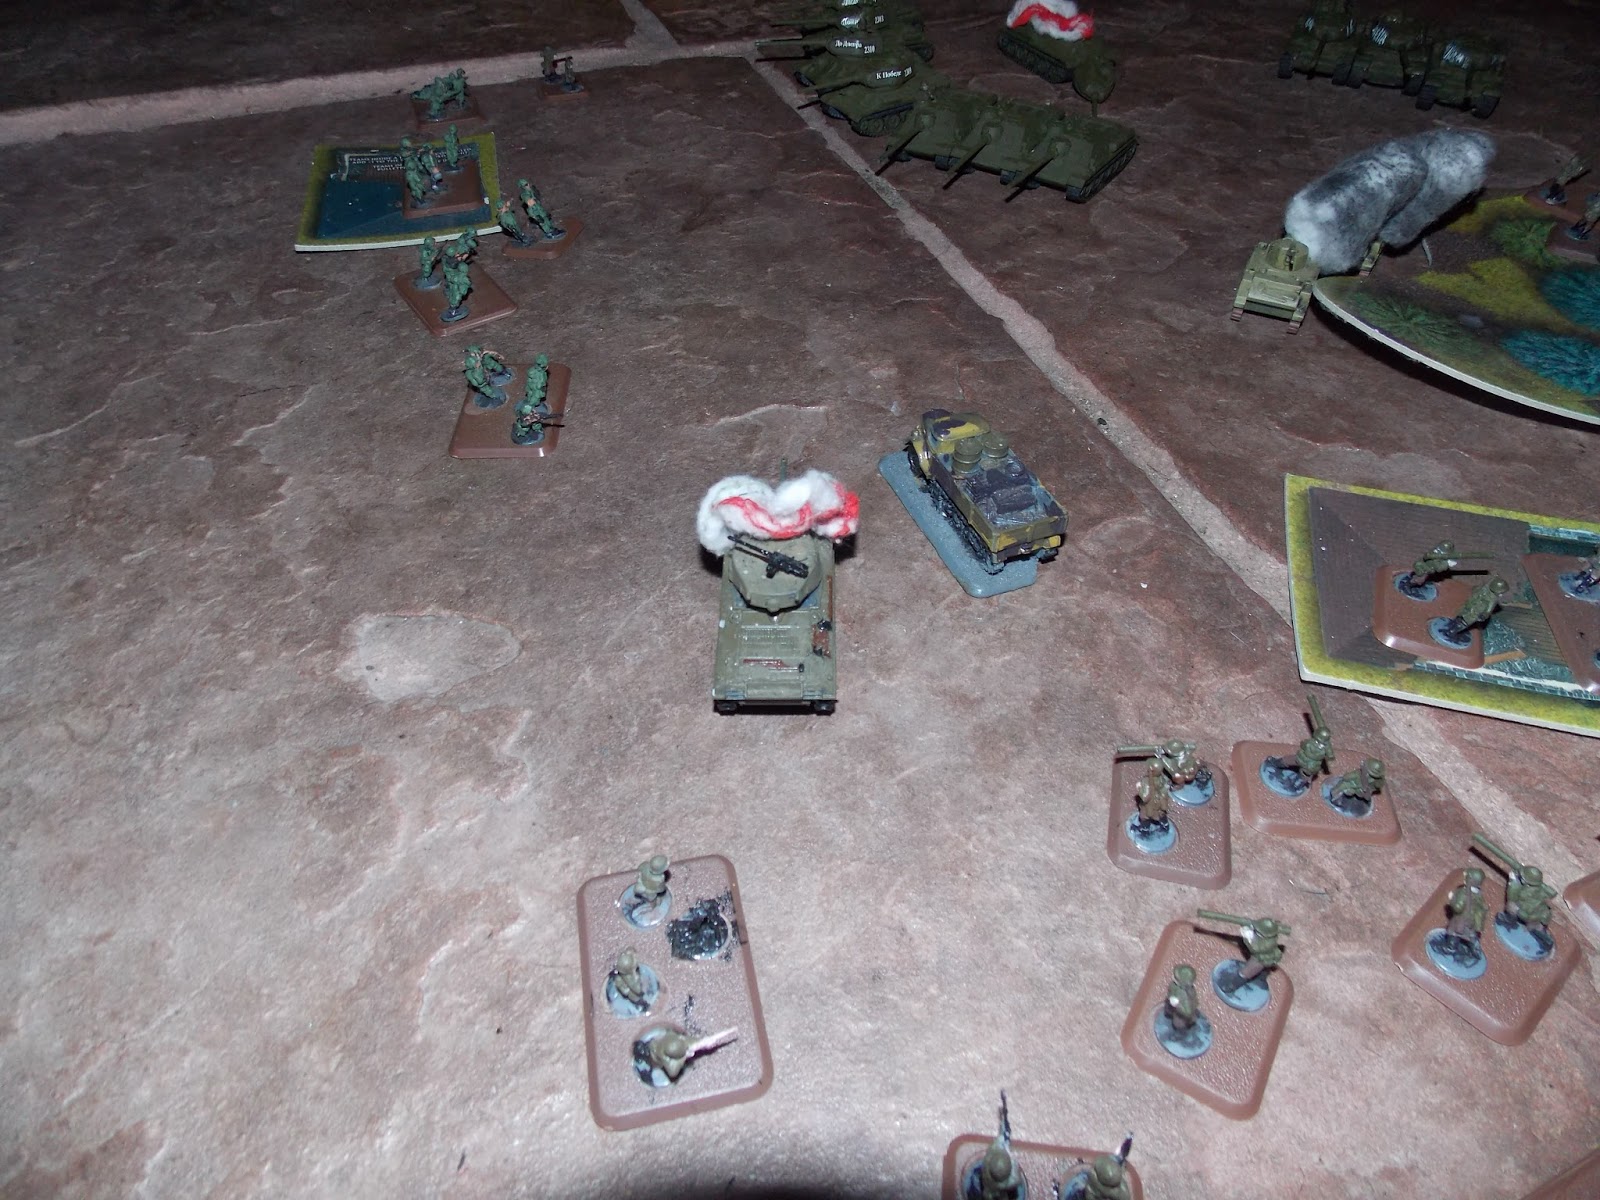
The US go all in, with pioneers booking it from reserve onto the US left, and the bazookas pop their ambush to confront the T-34s that got a little too close. The Shermans also move up, but the Stuart fails to remount. The last tank in the platoon drives up to get a single side shot on the SU-100s

GOGOGO!
The Soviets didn't really do a good job of hiding themselves...
The mortars continue to smoke the furious JS-2s, while the Shermans destroy one of the poorly hidden T-34s.
The Stuart, whose crew has the balls to move up and take on a whole spearhead, don't have the skills to hit a massive target at point blank range.
You had one job!
The success of the bazookas makes up for the Stuart's failure, dispatching one T-34 and bailing another.

Soviet Turn 4
The bailed T-34 remounts, and the whole force shifts towards the US left flank (I should have moved to the US right, but whatevs)

One SU-100 stares down the Stuart, while the rest of the force moves to finish the other Stuart.
 The T-34s on the US right double towards the US left, while the center JS-2s and T-34s join in the fun.

The T-34s that doubled
 The center forces shift towards the US left
 The developing situation
In all the shooting, the Stuarts are gutted (the really gutsy Stuart got double bailed by the SU-100)
and the JS-2s laserbeam a bazooka squad.

US Turn 4
Time for the counterattack! The Shermans move to the center, and the pioneers move up, as well as the bazookas that started on the board.

There they are boys!
 Pioneers (in the left of the pic) move towards the tank blob
 Movement around the center point of the battle

The double bailed Stuart flees the field. In shooting, the Shermans gut the center T-34s, while the pioneer bazookas blow up a T-34 on the US left.

The butchered center T-34s
 The severely battered flanking force

Soviet Turn 5
The CO of the center T-34 runs, while the JS-2s turn their death stares to the Shermans, ready to avenge their comrades. The flanking force moves to finish the pioneers.

JS-2s looking mean

The Pioneers get pinned

While the JS-2s punish the Shermans, popping two 75mm Shermans

US Turn 5
Not much that can be done now. Everything kinda stays put. The 76mm Shermans hit the JS-2s, but their shots are easily shrugged off by the heavy communist armor. The pioneers on the flank dig in, but their bazooka misses, and the platoon full of bazookas also whiff. The Soviets really got lucky there!

Soviet Turn 6
I'm still alive! The Shermans get hosed by the JS-2s heavy guns, and the flankers get yet another pin on the pioneers, who somehow remain unscathed.

Only the command Sherman is left, and he is of no threat to the JS-2S
 Pinned, but none dead.

US Turn 6
The antitank platoon scores 2 bails on the T-34s, while the lone 76 fails to kill any JS-2s.
 
Uncle Sam is not pleased

 Soviet Turn 7
The T-34s stick around and remount, while the JS-2s leave the Sherman to cut down some bazookas. The JS-2s pin down the bazookas with fire from the vehicle and .50 cal MGs, and the flanking force guns down 2 pioneer squads.


 The zooks can't scratch the JS-2s

US Turn 7
The zooks unpin, but the pioneers stay down. The other antitank platoon and the last Sherman move to defend the objective.

FORWARD!

The last pioneer bazooka whiffs again, while the antitank platoons manage to bail a T-34.

Soviet Turn 8
The JS-2s butcher the pesky bazookas in the woods between their plethora of MGs, and the T-34 remounts. The flanking force redeploys, with the SU-100s facing the last Sherman, who goes down in the face of the surging Red Tide. More pioneers are cut to ribbons by the T-34s.


US Turn 8
The pioneers unpin, while all the forces manifest around the objective. The only success the zooks have is bailing the company command.

Soviet Turn 9
The CO remounts, and the JS-2s, ready to deliver the death blow to the capitalists, move past the useless bazookas in the woods, and crash into the infantry out in the open.


The capitalist forces are mercilessly thrashed by the invincible JS-2s, SU-100s, and T-34s. The JS-2s finish an entire antitank platoon, and the pioneers end up hanging on by a thread.

The bazookas are quickly cut down by the hail of MG fire from the JS-2s
 While the SU-100s and T-34s continue massacring the pioneers

US Turn 9
In a last ditch effort, everything moves towards the objective. The pioneer's bazooka misses, and nothing else is in range.
 The situation

Soviet Turn 10
In a massive series of unfortunate events (for the US), the capitalists lose another platoon of bazookas, and the pioneers decide they have taken too much, and the survivors retreat to fight another day. Lacking antitank equipment, the panic turns into a massive rout, leaving the Soviets in control of the battlefield. The capitalist defensive line has been busted open by the unstoppable Soviet Army. The Soviets pour more forces through the gap, while an old British hero is called upon to force the Soviets back through the gap...

http://explore.bfi.org.uk/sites/explore.bfi.org.uk/files/styles/gallery_full/public/bfi_stills/bfi-00n-pqo.jpg?itok=-ko8HZCD